Build Workflows
Building workflows in VIDIZMO Agentic AI enables you to automate tasks, integrate AI models, and define the logical steps your agents perform.
A workflow is composed of nodes, where each node represents a specific action or stage in the process. The workflow receives input, processes it through connected nodes, and produces an output that is executed through the agent and can be retrieved directly from the agent’s responses.
This article guides you through the key steps for creating and managing workflows.
Create a Workflow
You can create workflows directly from the VIDIZMO portal. To access Workflow Designer:
-
Navigate to Portal Settings > Chatbot > Workflow Designer.
-
Open the Workflow Designer page to view existing workflows or create new ones.

VIDIZMO provides several ways to create a workflow:
Create a Workflow from Scratch
-
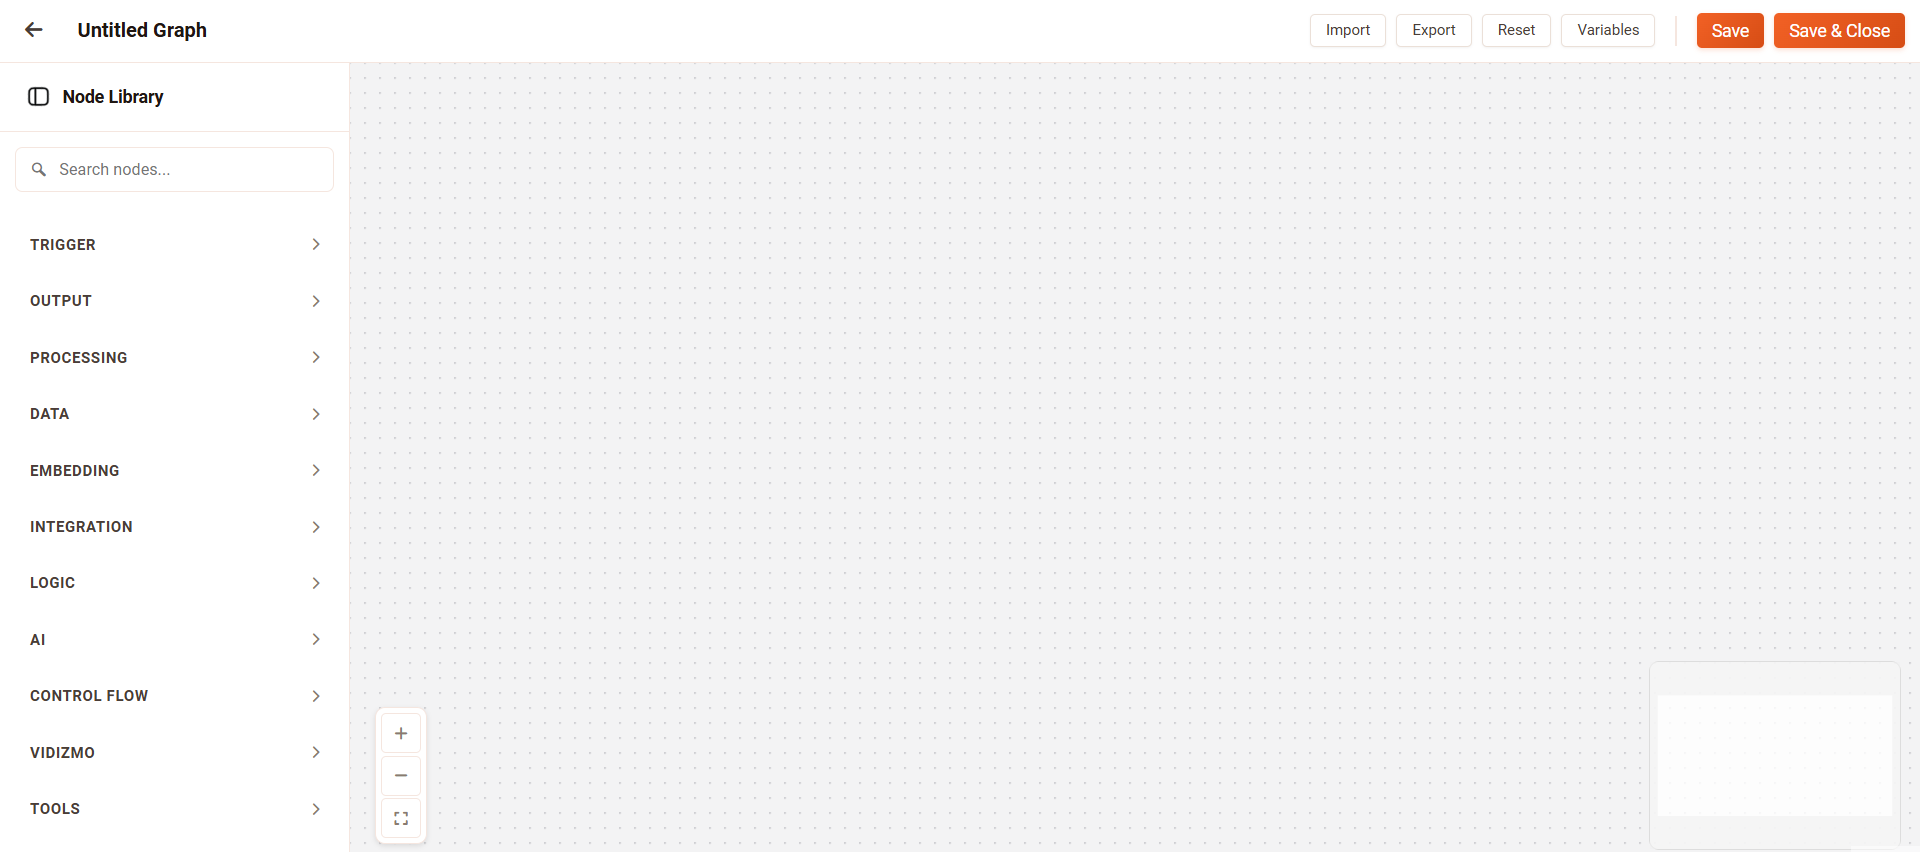
On the Workflow Designer page, click Add Graph.
-
Start with a blank canvas and build your workflow by adding nodes, configuring their settings, and connecting them to define the flow.
Duplicate an Existing Workflow Template
-
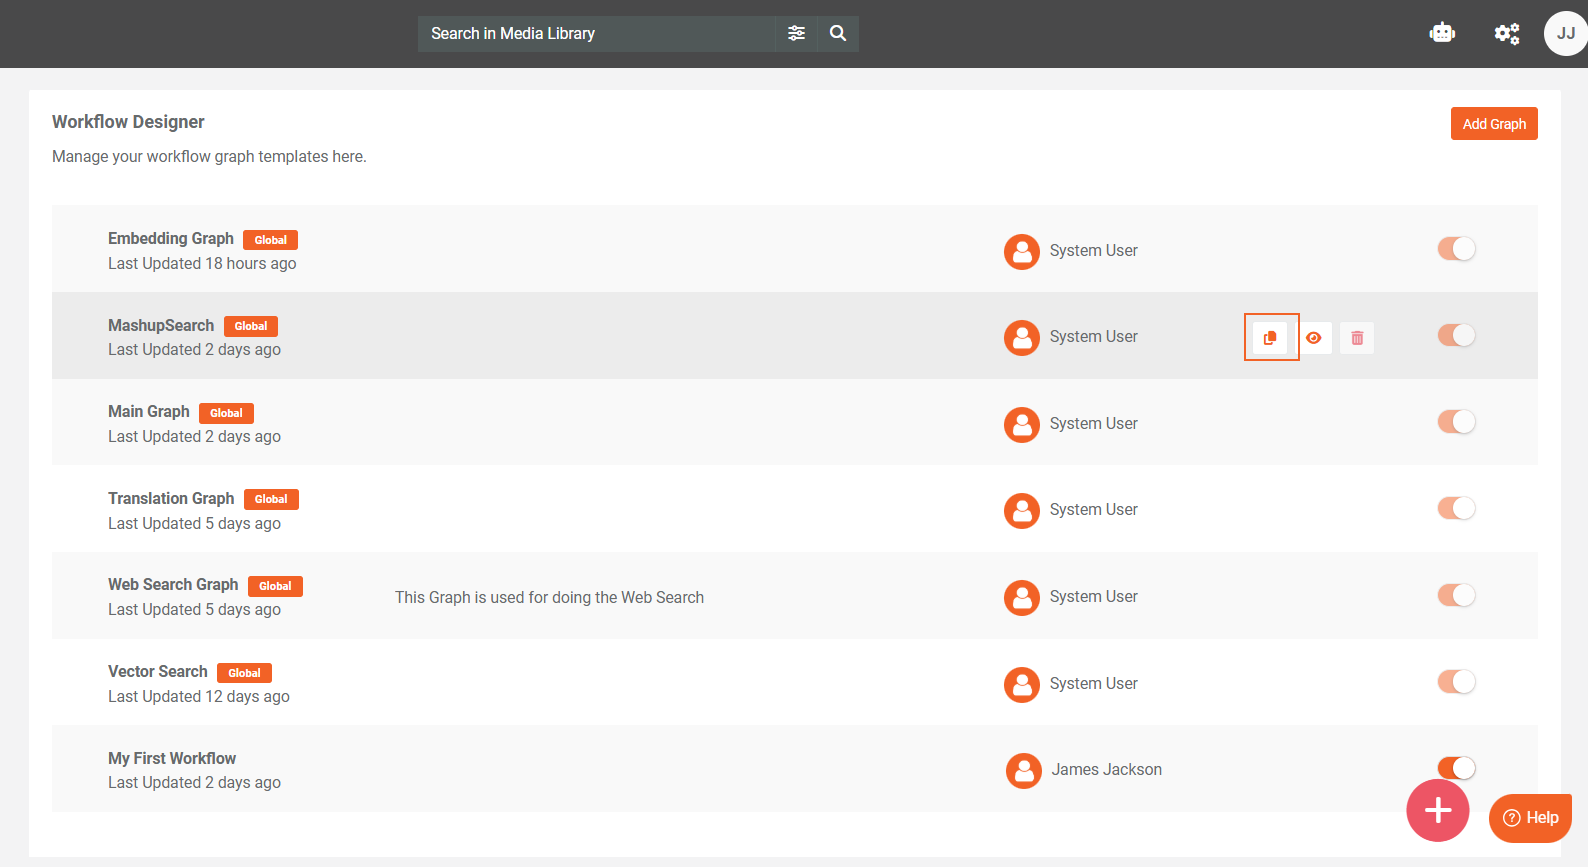
Locate the workflow template you want to use.
-
Hover over the template and select Clone. A copy of the workflow opens in the Workflow Designer.
-
Edit and customize the duplicated workflow to meet your requirements.
Note: Workflow templates are pre-built and available by default in the VIDIZMO portal. They are designed for common use cases and can be duplicated to serve as a starting point for creating custom workflows.
Import a Workflow
-
Use the JSON editor available in the Workflow Designer to import workflows.
-
Copy and paste the JSON code into the editor.
Imported workflows are immediately available in the designer for editing and execution. The import functionality using JSON code works exclusively within the VIDIZMO environment and is supported only for transferring workflows between VIDIZMO portals.

Note: Use the Export feature to generate the workflow as JSON. The JSON code can be copied and imported into another workflow, but this functionality works only within VIDIZMO portals.
Add Nodes
Workflows in VIDIZMO Agentic AI are constructed by adding, configuring, and connecting nodes on the canvas. Each node performs a specific task, such as receiving user input or processing data.
Adding Nodes to a Workflow
-
Open the Node Library in the Workflow Designer.
-
Browse or search for the desired node. Nodes are categorized by function, such as Triggers, Data, Logic, AI, and Integration.
-
Drag and drop the node onto the canvas, or click the + icon to add it directly.
-
Repeat as needed to include all nodes required for your workflow.
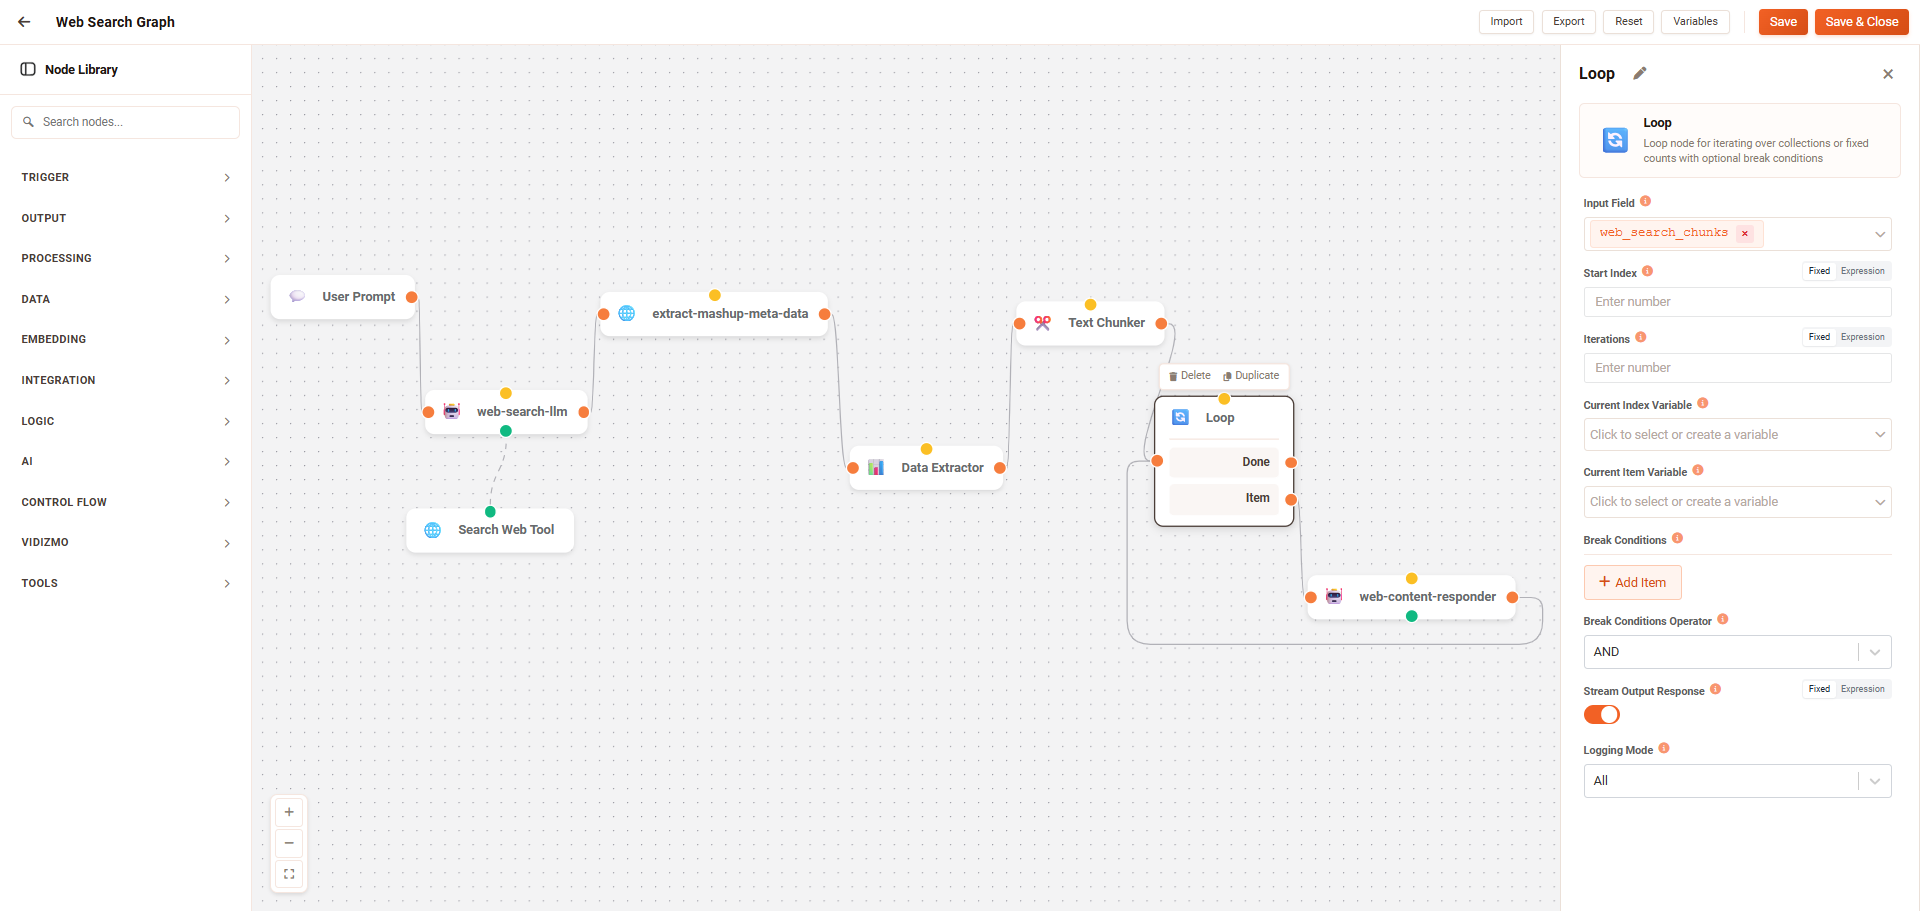
Configuring Nodes
Each node has settings that define its behavior. Some settings are common to all nodes, such as name, description, and input/output mapping. Other settings are specific to the node type. For example, the User Prompt Node captures input from the user.
Tip: The Node Configuration Panel opens automatically when a node is added. Required parameters are marked with *, while optional parameters can be set as needed.
Connecting Nodes
Nodes are connected via edges (lines) that define the flow of data.
-
Click the output connector (●) on the source node.
-
Drag the line to the input connector on the target node.
-
Release to create the connection.
Edges enforce data type compatibility, ensuring outputs from one node can be correctly processed by another. Some nodes support multiple outputs, allowing branching logic or parallel processing of array items.
For detailed information about node types, connector types, and underlying behavior, see Nodes.
Run a Workflow
When a workflow runs, VIDIZMO generates graph based on the nodes and connections you designed. Each node is executed in sequence according to its dependencies, ensuring that required inputs are available before the node runs.
The output of a node is passed automatically to any downstream nodes that depend on it, and this continues until all connected paths have completed. This structured execution model ensures predictable results and supports complex branching, decision-making, and data-processing tasks across your workflow.
Configure the Workflow in an Agent
After creating and saving a workflow in the Workflow Designer, the next step is to configure it within an agent. Agents control how workflow runs, including the context provided during execution. Once a workflow is assigned to an agent, it becomes part of the agent’s behavior.
For more details about how agents operate, refer to the Agents documentation.
Test a Workflow
VIDIZMO provides two ways to test workflows:
-
Workflow Designer: Click the Test button to open a chat interface for real-time testing. You can provide initial execution state to pre-populate workflow variables before running the test.
-
AI Chatbot: Once a workflow is assigned to an agent, test it through the chatbot for end-to-end validation.
For detailed information about testing options, initial state configuration, and execution results, see Test Workflows.
Manage Workflows
VIDIZMO workflows can be managed directly from the portal, allowing you to control which workflows are active, edit existing workflows, and maintain reusable configurations.
Activate / Inactive
Toggle the Active / Inactive switch to enable or disable the workflow.
-
Active: The workflow runs automatically as part of the configured agent.
-
Inactive: The workflow is dormant and does not affect the agent.
Clone / Edit / Delete
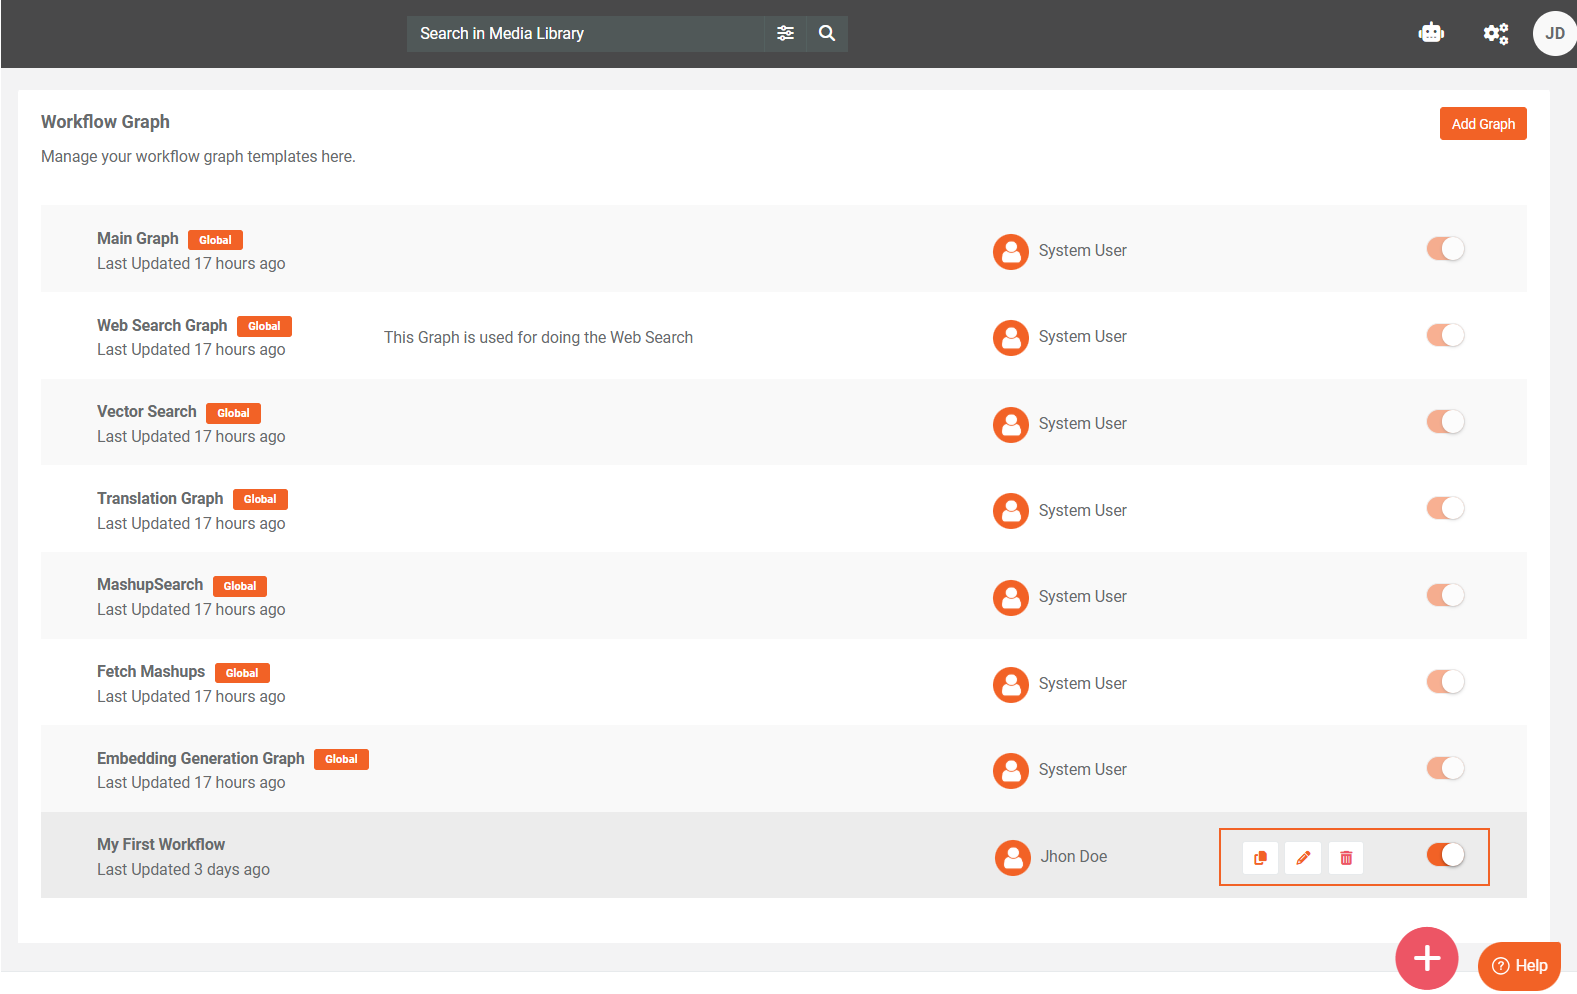
- Clone a Workflow:
-
Hover over the workflow and select Clone.
-
Modify the duplicated workflow in the Workflow Designer to create a new version.
- Edit a Workflow:
-
Opens the workflow in the Workflow Designer.
-
Update nodes, logic, or settings as needed.
-
Save changes to apply them to the agent configuration.
- Delete a Workflow:
-
Hover over the workflow and select Delete.
-
Confirm deletion.
-
Deleted workflows are removed from the portal and cannot be recovered unless previously exported.
Next Steps
To continue refining your workflows, explore workflow templates, test workflows in the AI Chatbot, and refer to the Nodes Overview for detailed node configuration and capabilities.